11. Create a list with RecyclerView
The RecyclerView widget is a more advanced and flexible version of ListView. It is used for displaying a scrolling list of elements based on large data sets. This worksheet will create a scrolling list of users’ names and their address.
11.1. Add RecyclerView to layout
-
Create a new empty project, and remove the Hello World TextView in
activity_main.xml. -
Search
RecyclerViewin the Palette and drag it toactivity_main.xml. Click OK when it asks to add theRecyclerViewdependency. Under the Text tab it should look something like this:<?xml version="1.0" encoding="utf-8"?> <androidx.constraintlayout.widget.ConstraintLayout xmlns:android="http://schemas.android.com/apk/res/android" xmlns:tools="http://schemas.android.com/tools" xmlns:app="http://schemas.android.com/apk/res-auto" android:layout_width="match_parent" android:layout_height="match_parent" tools:context=".MainActivity"> <androidx.recyclerview.widget.RecyclerView android:id="@+id/RecyclerView" android:layout_width="395dp" android:layout_height="0dp" app:layout_constraintStart_toStartOf="parent" android:layout_marginStart="16dp" app:layout_constraintTop_toTopOf="parent" android:layout_marginTop="8dp" app:layout_constraintBottom_toBottomOf="parent" android:layout_marginBottom="8dp"/> </androidx.constraintlayout.widget.ConstraintLayout>
-
If there is error at
androidx.recyclerview.widget.RecyclerViewThis can be removed by clicking the infer constraint button.
11.2. Create a layout for items in the list
In this exercise, one item consists of a name and a corresponding address. This can be modified to contain other information/pictures.
-
Click the Text tab and change
android:layout_height="match_parent"
to
android:layout_height="wrap_content"
By doing this, item will be placed under the previous one, otherwise, every new item will appear on a new page.
-
Create a new layout resource file and name it
item_layout.xml. -
Add a
TextViewand constrain the text box to the top and left of the layout (with suitable margins). Nameid“textViewName”. -
Similarly, add another
TextView. Constrain the top of the new text box to the bottom of the previous text box, and constraint the right side of the new text box to the left of the layout. Nameid“textViewAddress”.
11.3. Create a data class
Right-click on the com.example.yourProjectName folder and create a new Kotlin file called User. Create a data class User with 2 String parameters name and address.
11.4. Create RecyclerView Adapter
-
Under the same folder where
Userdata class was created, create a Kotlin classRecyclerViewAdapter. The class should be specified as below:class RecyclerViewAdapter (val userList: ArrayList<User>) : RecyclerView.Adapter<RecyclerViewAdapter.ViewHolder>(){ ... }
-
There are three functions required for
RecyclerViewAdapterclass.override fun getItemCount(): Int { return userList.size }
getItemCount()function provides the size of the list.override fun onCreateViewHolder(parent: ViewGroup, viewType: Int): ViewHolder { val layoutInflater = LayoutInflater.from(parent.context) val row = layoutInflater.inflate(R.layout.item_layout, parent, false) return ViewHolder(row) }
LayoutInflateris used to instantiate layout XML file into its corresponding View objects.onCreateViewHolderfunction returns the view for each item in the list.override fun onBindViewHolder(holder: ViewHolder, position: Int) { holder.bindItems(userList[position]) }
onBindViewHolderfunction is called for eachViewHolderto bind it to the adapter. This is where data is passed toViewHolder. -
Then create another class called
ViewHolderinside theRecyclerViewAdapterclass. This class holds the list view.class ViewHolder(itemView: View) :RecyclerView.ViewHolder(itemView){ fun bindItems(user: User) { val textViewName = itemView.findViewById(R.id.textViewName) as TextView val textViewAddress = itemView.findViewById(R.id.textViewAddress) as TextView textViewName.text = user.name textViewAddress.text = user.address } }
11.5. Create RecyclerView
Now go to MainActivity.kt and write the following code inside onCreate function.
-
First, create a
RecyclerView:val recyclerView = findViewById(R.id.RecyclerView) as RecyclerView
-
Then add a
LayoutManager. It is responsible for measuring and positioning item views within aRecyclerViewas well as determining the policy for when to recycle item views that are no longer visible to the user. This one implements a standard vertically scrolling list.recyclerView.layoutManager = LinearLayoutManager(this, RecyclerView.VERTICAL, false)
-
Add data to the list:
val users = ArrayList<User>()
users.add(User("user1", "address1"))
users.add(User("user2", "address2"))
users.add(User("user1", "address1"))
users.add(User("user2", "address2"))
users.add(User("user3", "address3"))
users.add(User("user4", "address4"))
users.add(User("user5", "address5"))
users.add(User("user6", "address6"))
users.add(User("user7", "address7"))
users.add(User("user8", "address8"))
users.add(User("user9", "address9"))
users.add(User("user10", "address10"))
users.add(User("user11", "address11"))
users.add(User("user12", "address12"))
users.add(User("user13", "address13"))
users.add(User("user14", "address14"))
users.add(User("user15", "address15"))
users.add(User("user16", "address16"))
users.add(User("user17", "address17"))
users.add(User("user18", "address18"))
users.add(User("user19", "address19"))
...
-
Create adapter and add it to
RecyclerView:val adapter = RecyclerViewAdapter(users) recyclerView.adapter = adapter
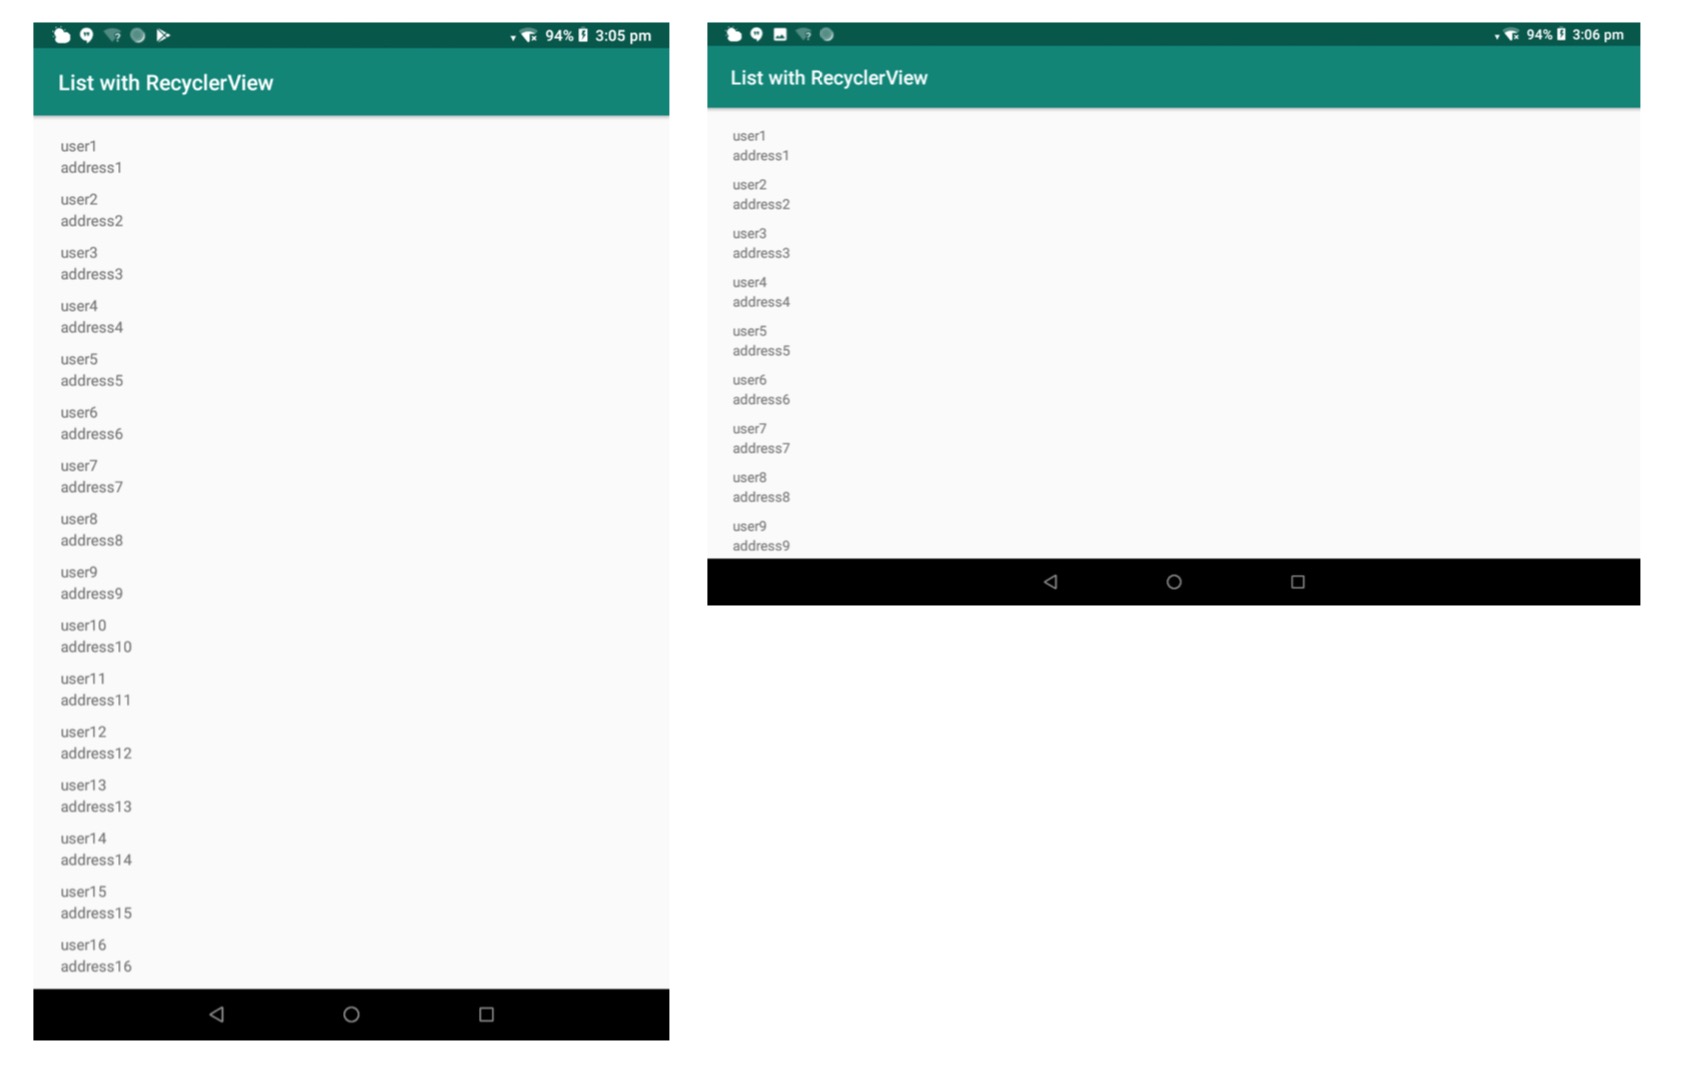
11.6. Run the app
Click Run to install and run the app. It should look like the pictures below on the Lenovo tablet.