12. Using Fragments
A fragment is a modular section of an activity, it represents a particular operation or interface that is running within a larger Activity. Fragment defines its own lifecycle, however that lifecycle is dependent on its activity.
The advantages of fragments are as follows:
-
Modularity: Instead of writing all the code in one Activity, we can separate out the code for distinct parts of the UI into different fragments
-
Reusability: Fragments encapsulate views and logic so that it is easier to reuse these views and logic within activities
-
Adaptability: Depending on the screen size of the hardware and the orientation of the screen, different layouts can be easily implemented, hence user experience is better
The core series of lifecycle methods that are called to bring a fragment up to resumed state are:
-
onAttach(Activity): called once the fragment is associated with its activity. -
onCreateView(LayoutInflater, ViewGroup, Bundle): creates and returns the view hierarchy associated with the fragment. -
onActivityCreated(Bundle): tells the fragment that its activity has completed its own ActivityonCreate. -
onViewStateRestored(Bundle): tells the fragment that all of the saved state of its view hierarchy has been restored. -
onStart(): makes the fragment visible to the user. -
onResume(): makes the fragment begin interacting with the user.
When a fragment is no longer being used, it goes through a reverse series of callbacks:
-
onPause(): fragment is no longer interacting with the user either because its activity is being paused or a fragment operation is modifying it in the activity. -
onStop(): fragment is no longer visible to the user either because its activity is being stopped or a fragment operation is modifying it in the activity. -
onDestroyView(): allows the fragment to clean up resources associated with its View. -
onDestroy(): called to do final cleanup of the fragment’s state. -
onDetach(): called immediately prior to the fragment no longer being associated with its activity.
12.1. Create Fragments
-
Create a new empty project, and remove the Hello World TextView in
activity_main.xml. -
Add a
buttonto the layout and changeTextto “Change Fragment”. Then add aFrameLayoutwithid= “fragment_holder”. -
Create a new Kotlin file under same folder as
MainActivity, name itFirstFragment. Override all functions in the fragment’s life cycle:class FirstFragment : Fragment(){ override fun onAttach(context: Context?) { super.onAttach(context) } override fun onCreate(savedInstanceState: Bundle?) { super.onCreate(savedInstanceState) } override fun onCreateView(inflater: LayoutInflater, container: ViewGroup?, savedInstanceState: Bundle?): View? { return super.onCreateView(inflater, container, savedInstanceState) } override fun onActivityCreated(savedInstanceState: Bundle?) { super.onActivityCreated(savedInstanceState) } override fun onStart() { super.onStart() } override fun onResume() { super.onResume() } override fun onPause() { super.onPause() } override fun onStop() { super.onStop() } override fun onDestroy() { super.onDestroy() } override fun onDetach() { super.onDetach() } }
-
Create a new layout resource file, with
Root elementis RelativeLayout andFile Nameis first_fragment. Then add aTextViewat center of the design and changeTextto “First Fragment”. -
Go back to
FirstFragment.kt, inonCreateViewfunction, rewritereturnto the following:return inflater.inflate(R.layout.first_fragment,container,false)
Then, create a
valto represent FirstFragment such as:val f = "FIRST"
And add a
Logto every function, when the app runs, it will show the functions that`FirstFragmentcalled, which will provide a clearer view of a fragment’s lifecycle. Write the following code to all functions:Log.d(f, "functionName")
-
Duplicate
FirstFragment.kttoSecondFragment.ktandfirst_fragment.xmltosecond_fragment.xml. Then change any references to “first” in the code to “second”.
12.2. Use and Swap Between Fragments
-
In
MainActivity.kt, declare the following variables:var isFirstFragmentLoaded = true val manager = supportFragmentManager
In
onCreatefunction, declare a variable:val change_fragment = findViewById<Button>(R.id.button)
-
Create a function called
showFirstFragment()underMainActivityand write the following code which will loadFirstFragment:val transaction = manager.beginTransaction() val fragment = FirstFragment() transaction.replace(R.id.fragment_holder,fragment) transaction.addToBackStack(null) transaction.commit() isFirstFragmentLoaded = true
Then duplicate the function to
showSecondFragment()with some changes in the code:... val fragment = SecondFragment() ... isFirstFragmentLoaded = false
-
Now go back to
onCreatefunction and set up asetOnClickListener. Whenever thebuttonis clicked, switch to another Fragment. The App starts withFirstFragment.showFirstFragment() change_fragment.setOnClickListener({ if (isFirstFragmentLoaded) { showSecondFragment() } else { showFirstFragment() } })
-
Now install and run the app. It should look like the pictures below on the Lenovo tablet.

-
Under
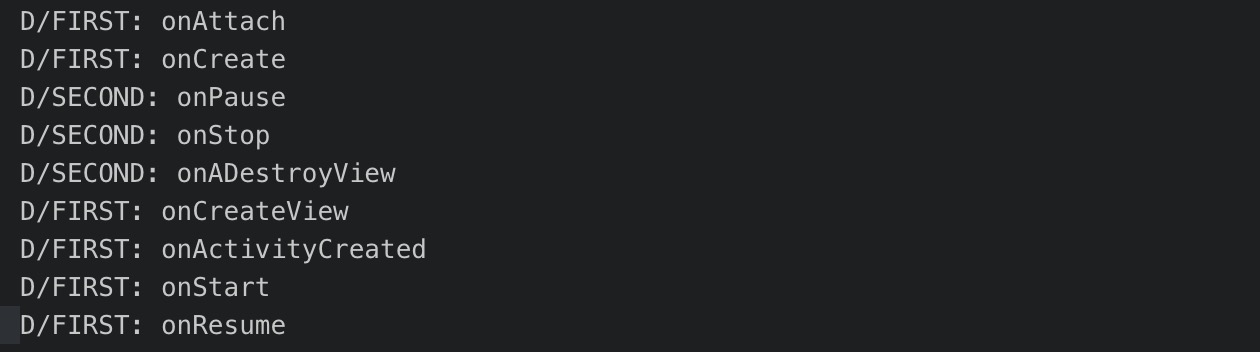
Runat the bottom of Android Studio, you should see the following:When the app starts:

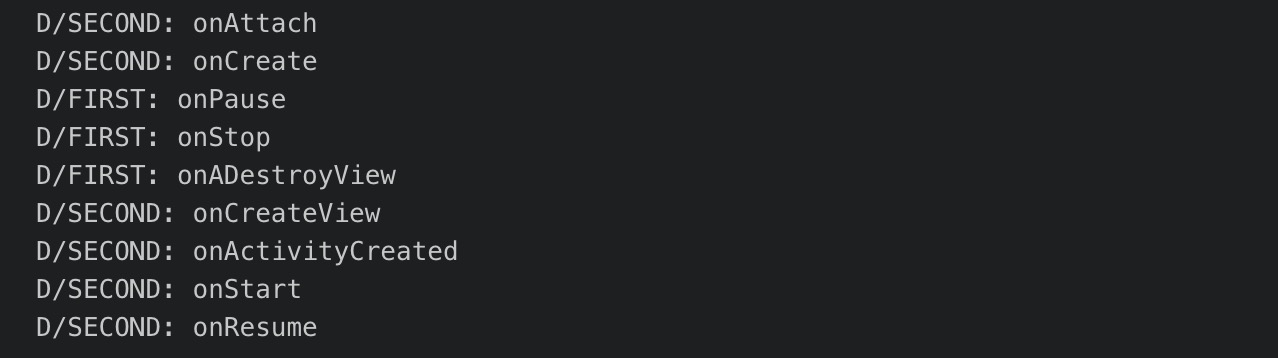
When the click the button once:
When click the button another time: